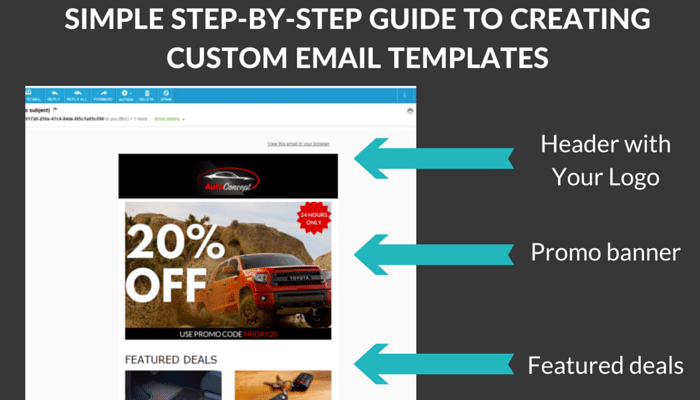
Whether you’re trying to win back shoppers who abandoned their carts or looking to update your customers on the latest sales and events, a clean, professional-looking email is the best way to send out the word. It looks so much better than a plain-old email, and will boost customer impressions of your dealership. Here is a complete walkthrough step-by-step on how to design your own email template in Mail Chimp.
Making email templates through an email provider like Mail Chimp is easy and inexpensive. If you have less than 2000 subscribers, it’s free!
Once you’re signed up, here’s our step-by-step to create your very first template:
1. Click “templates” and then navigate to “create template.”
Once you select “basic,” you can see the layout options to choose from.
2. Choose a template.
This should be based on how you want the layout to look and if you want multiple columns within the email. For this example, we’ll keep it simple and choose the single column layout.

3. Add a header with your logo.
First, we’ll change the background color. To do so, navigate over to the “design” tab, and then click “header.” From there, select a color by clicking on the color square beneath the background title.
We strongly recommend setting the color background to match your logo’s background. If your logo is on a white background, then set the header background to white. Our example has a black background.
When you’re done hit the save & close button (make this a best practice so you don’t lose your work)!
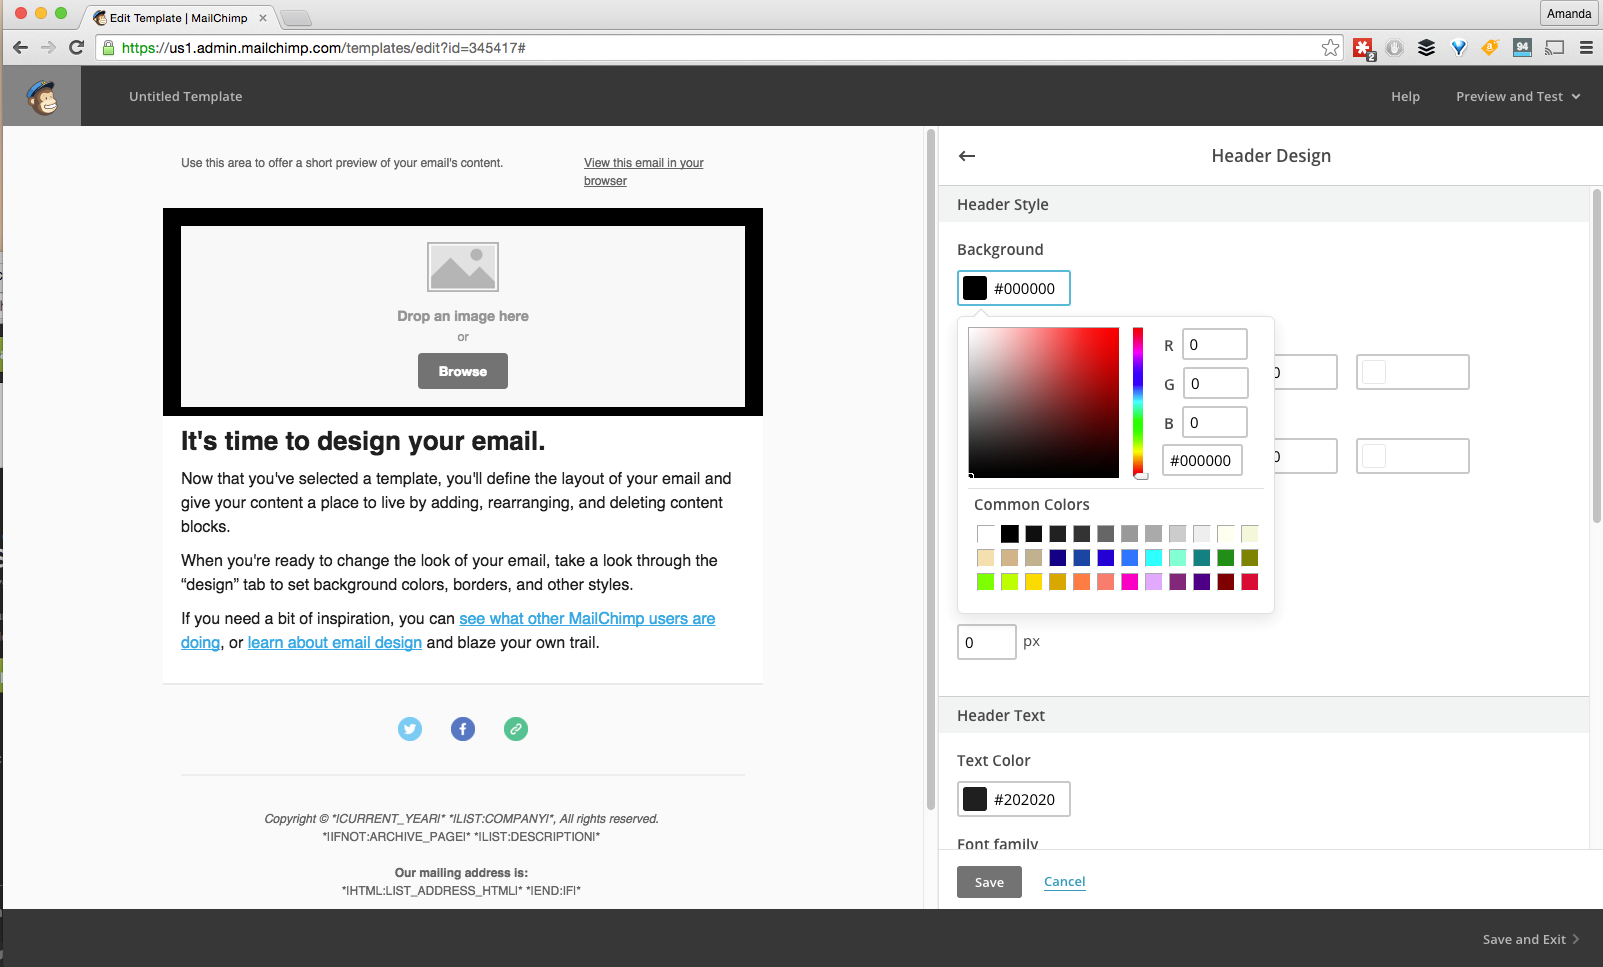
Once you’ve chosen the right background color, click “browse” on the header box to upload your logo. If necessary, resize (we resized ours to be 200px wide) by clicking “edit photo” and then “resize.”
4. Add text or an image for your promotion.
You don’t need to have crazy designer skills to create great images. A free program like canva.com makes it incredibly easy for us regular folks to make professional-looking images to highlight promotions and sales. The first step is signing up for a free account with Canva.
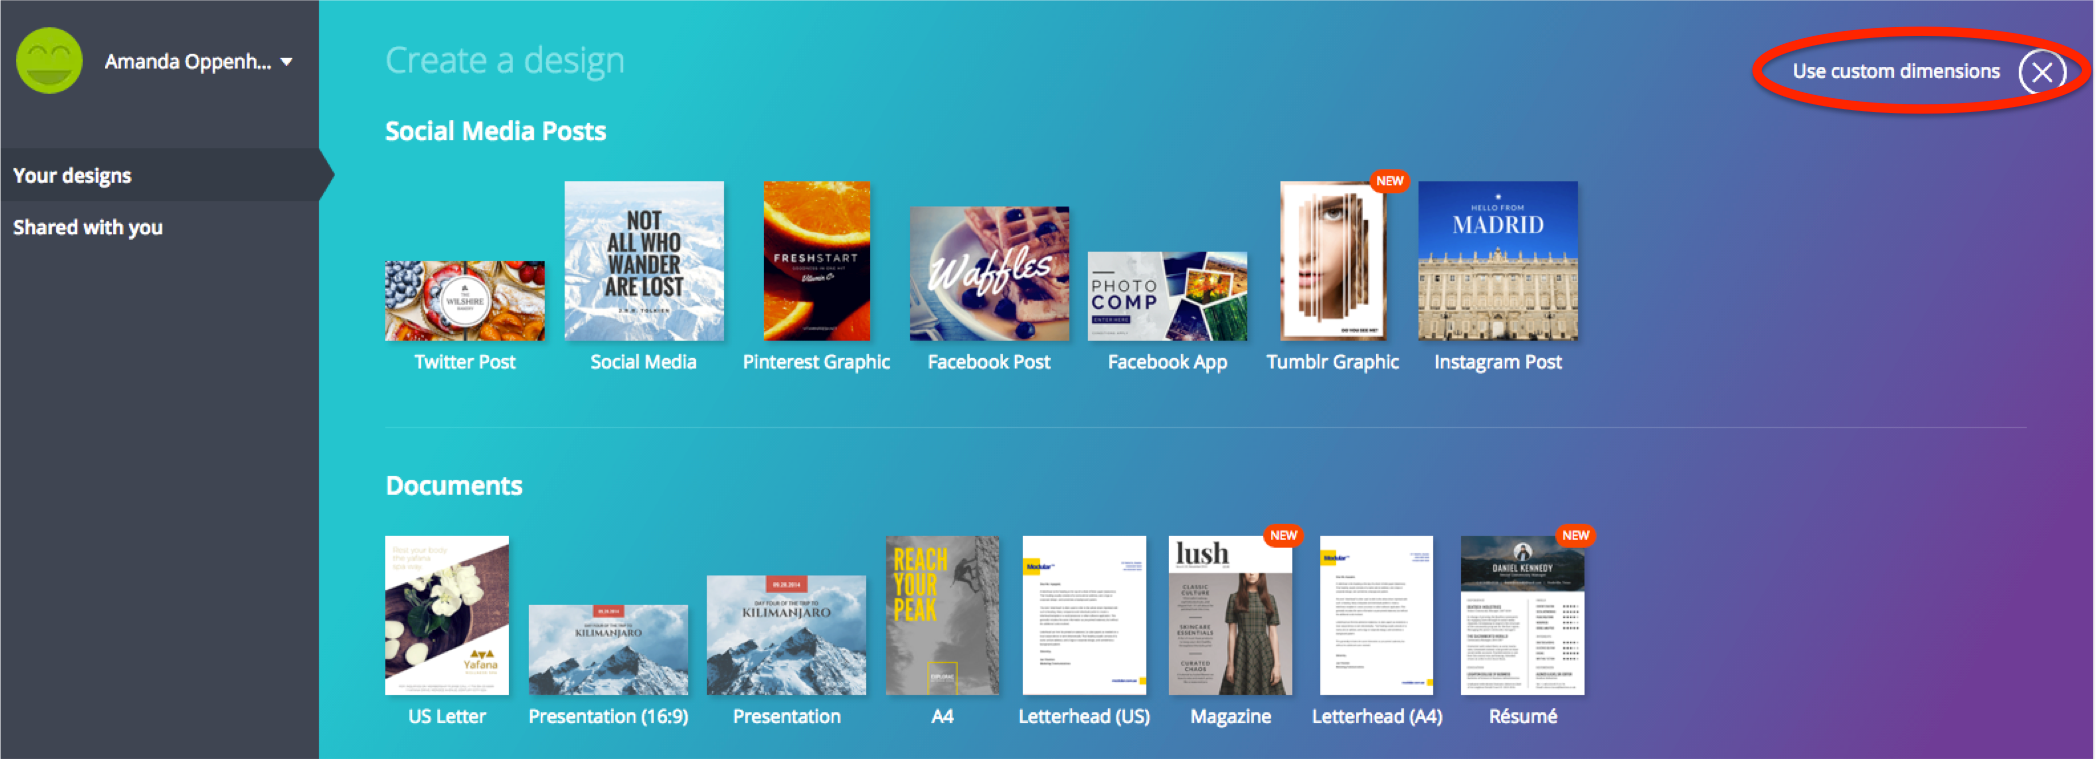
a. To get started with a design, click on the Canva logo in the top left corner to see all of your design options. Then start a design, go to the upper right corner, and click “custom dimensions.” Type 600 for width and 400 for height (this is a good size for an email banner). You don’t want your email images to be any wider than 600px or else the email formatting might look weird in people’s inboxes.
b. Once you’re on the canvas, you’ll notice all your menu options on the left side. Add a manufacturer compliant photo by clicking “upload,” then click on the photo to bring it on to your canvas. You can zoom in on the photo and make it bigger by dragging the corners. It’s best if you pick a photo that has some room on the side of the vehicle or main image so that you can add text that is easy to read.
c. Click “text” from the side menu and add a heading with your offer (free shipping, percent discount, etc). Change the font and color as you see fit. You can change the spacing between lines by clicking the drop down arrow next to the trash can icon, then click “text spacing” to adjust the line height.
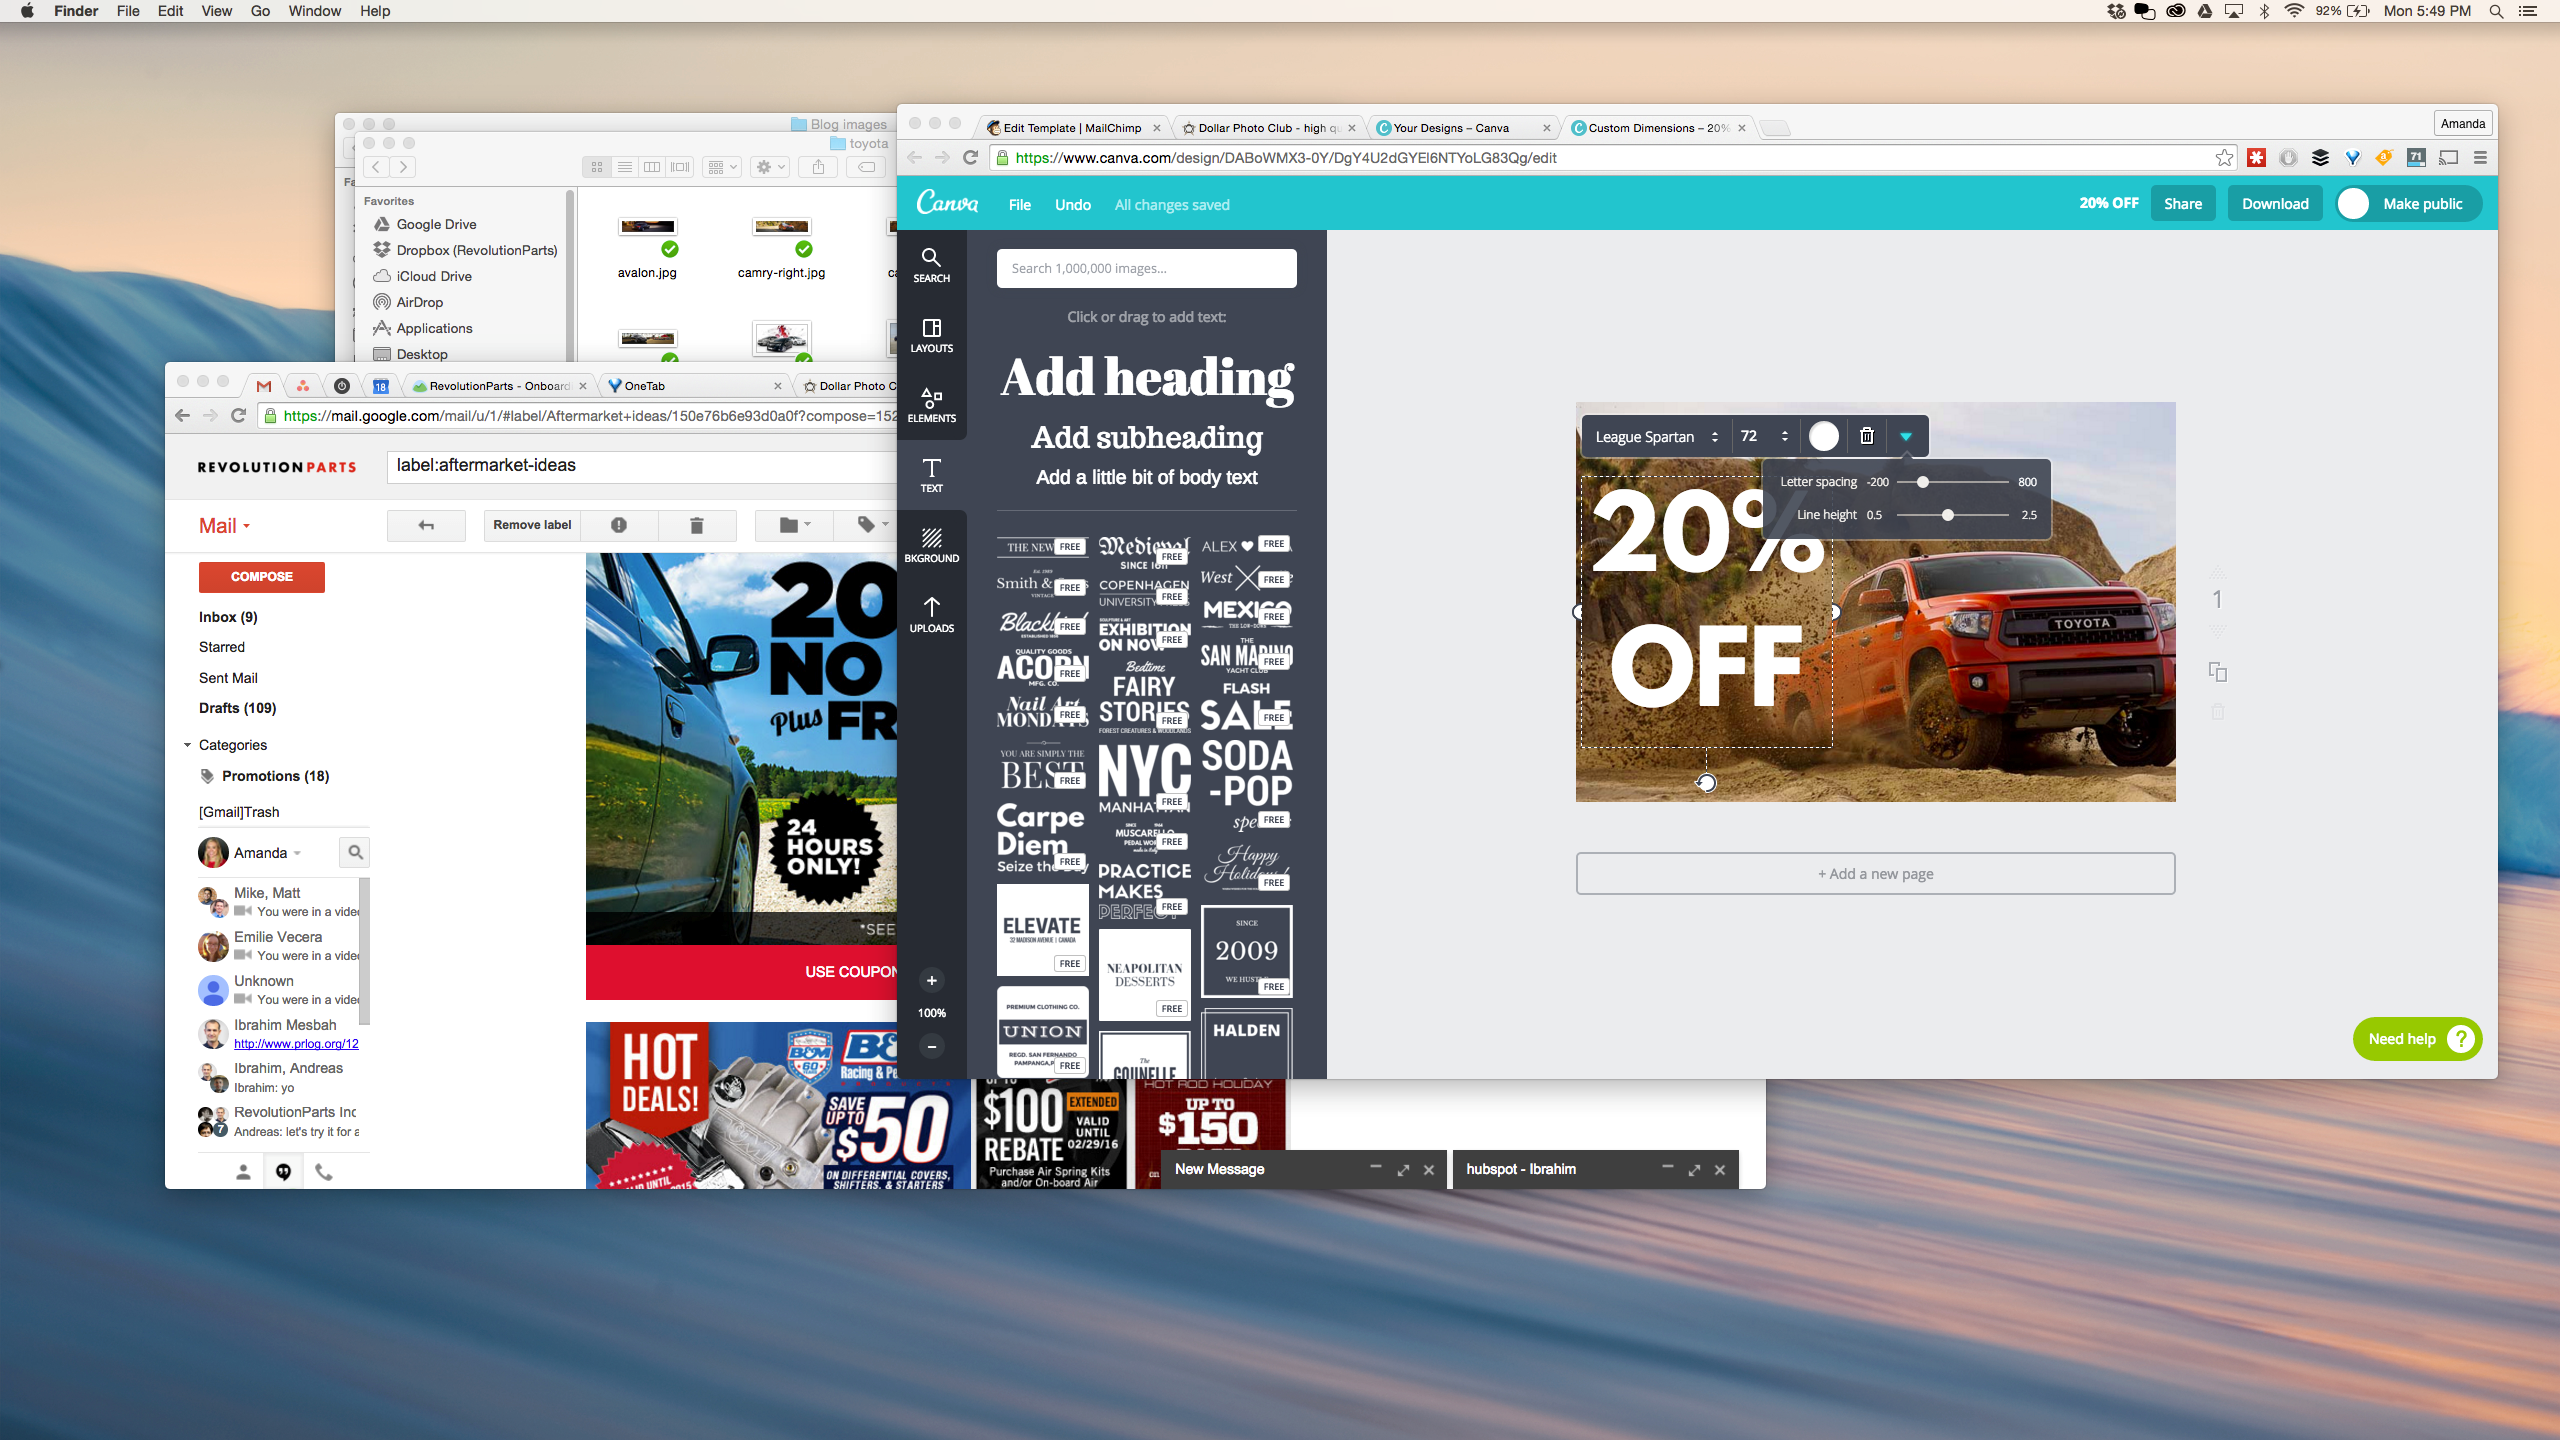
d. You can add an element to highlight free shipping, how long the promo lasts, or any extra information. Adding text like “24 Hours Only” helps create a sense of urgency and is more likely to make the buyer take action. To create a badge like the one in our example, click on “elements” followed by “shapes,” then find one that you like. You can then resize and recolor to fit your email banner, then add text and put it over the badge.
e. Additionally, you can add a bar at the bottom to give shoppers a promo code. To do this, click on “elements,” then “shapes,” then add a rectangle. Stretch the rectangle out to be long and thin. Add text with your promo code and you’re good to go!
f. When you’re happy with your design, go to the top right corner to find the “download” button. Choose a jpg format and download.
g. Back in Mail Chimp, delete the template content block that has sample content. Click on the content tab and drag an image block onto the content block below the header (the section will say “drop content blocks here”). Once you’ve uploaded your image, click on it to add a link to your website. This way, people can start shopping as soon as they click on the image in their email.
5. Keep adding information.
Below the main image banner, you can add featured parts, specific deals, or a section of content highlighting your fast shipping and great customer service. No matter what you’re promoting, Mail Chimp has a lot of layout options to choose from.
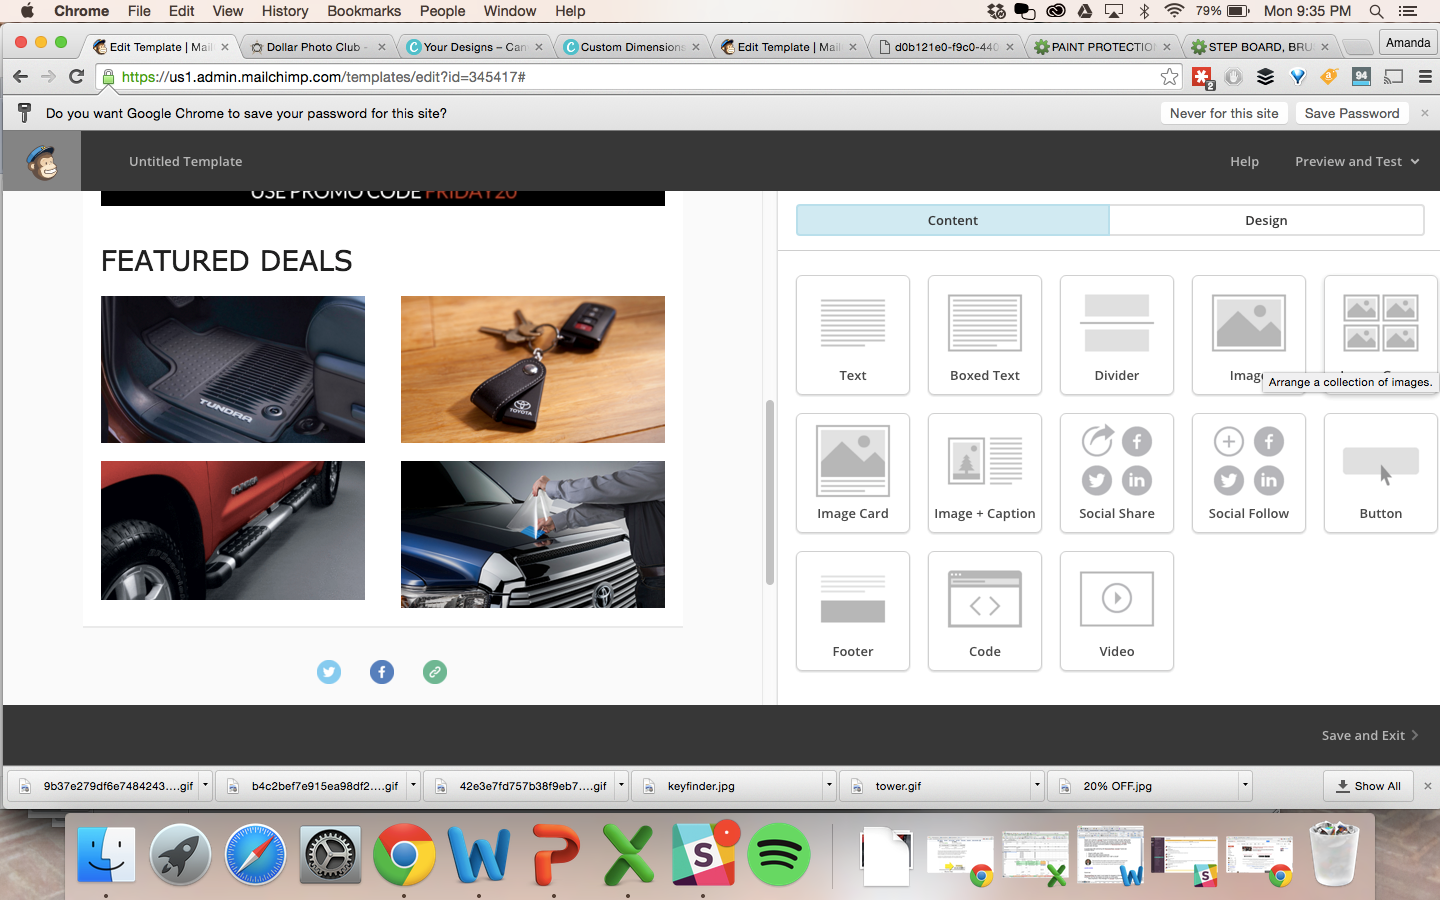
In our example, we chose to add a grid of featured products (for you, we recommend adding titles over the images so people know what the products are). Ours was just for show so you can see the different things you can do with Mail Chimp.
To add a grid like this, just click the “content” tab, drag the image group over, and add the images. Make sure to link the images to your product pages. You can also drag a text box over above the image grid to give the section a title like Featured Parts.
6. All of the details of your coupon and promotion should be readily available at the bottom of the email.
Include:
- Expiration date
- Restrictions & exclusions on the promotions
- All the fine print consumers should know and to ensure your advertising isn’t deceptive.
7. If you have social media pages, add links to the social media icons.
You’ve created your first template! Be sure to save your work, because one template can get a lot of future use and save you a lot of time. For future promotions, you only need to swap out the images and the rest of the work is already done!
